A Sweet and Salty Spin on Spumoni

photo 1

Pistachios…a sweet and salty snack.  Sweet and salty flavors are definitely one of my favorites; peanut butter and chocolate, salted caramel anything, on and on…. Pistachios fall into this category also.  Pistachios are the nut found on a Pistacia vera tree, and are a member of the cashew family.  The taste is salty, similar to a cashew in its creaminess, and slightly sweet.  It is actually very hard to describe, it’s almost an emotional kind of taste – you know it when you taste it!  It is unique.  Spumoni is a dessert that showcases pistachios; layers of chocolate, pistachio and cherry ice cream.  Delizioso!

For this next cupcake in my journey, Iced Pistachio Cupcakes, I wanted to remain true to the recipe but I also wanted to put my own spin on it.  So, half of the cupcakes are made exactly according to the recipe and the other half are topped with my interpretation of Italian spumoni.  If you would like the recipe, click here (courtesy of My Bare Cupboard).

Mise en place

photo 2

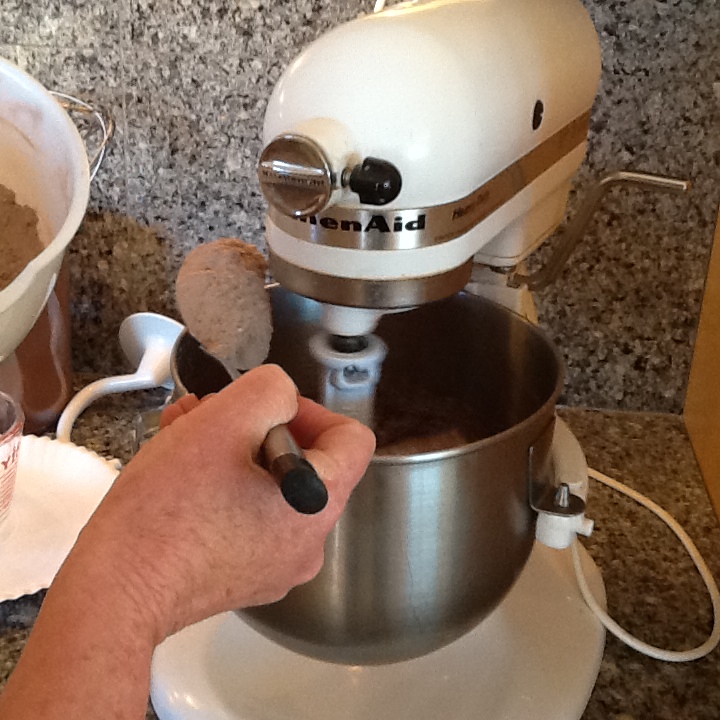
Before actually starting the recipe, some prep work needed to be done.  First, I ground pistachios to a paste.  Then I coarsely chopped additional pistachios.

photo 3photo 4

Once this prep work was done I could get started.  I creamed together butter, cream cheese and the pistachio paste.  After this mixture was fluffy, I added sugar which I beat in until smooth.  Eggs were next, one at a time, and beaten until incorporated.  The final steps were to add vanilla bean paste, a drop of pistachio oil, flour and salt.

I added the coarsely chopped pistachios by hand to the batter.  That’s it!  It was pretty easy once the grinding and chopping were done.

photo 5

Here they are out of the oven.  Hmmmm…. very flat.  But again, as in the previous few recipes, no leavening was used.photo 2 (2)

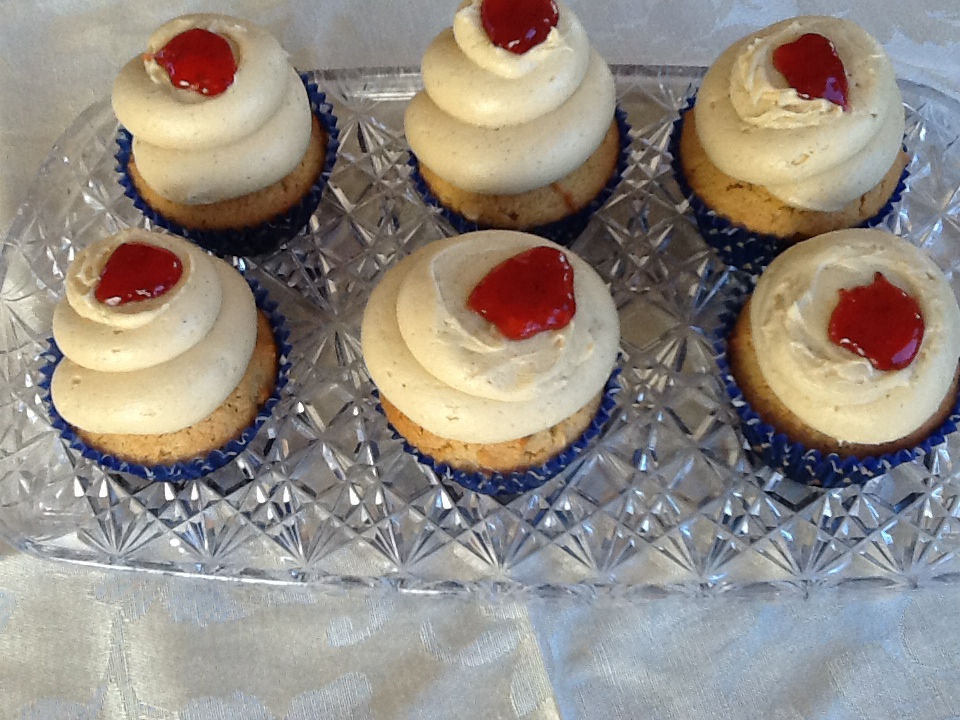
Martha’s recipe calls for a simple confectioners sugar glaze to go on top of the cupcakes.  Very easy, just confectioners sugar, cream, lemon juice and a tiny bit of vanilla.  This is what I used for half of the cupcakes.   Here is how they turned out.photo 4 (2)

The other half of the cupcakes received a special topping:  Cherry glaze, pistachio cream cheese frosting and a chocolate drizzle.

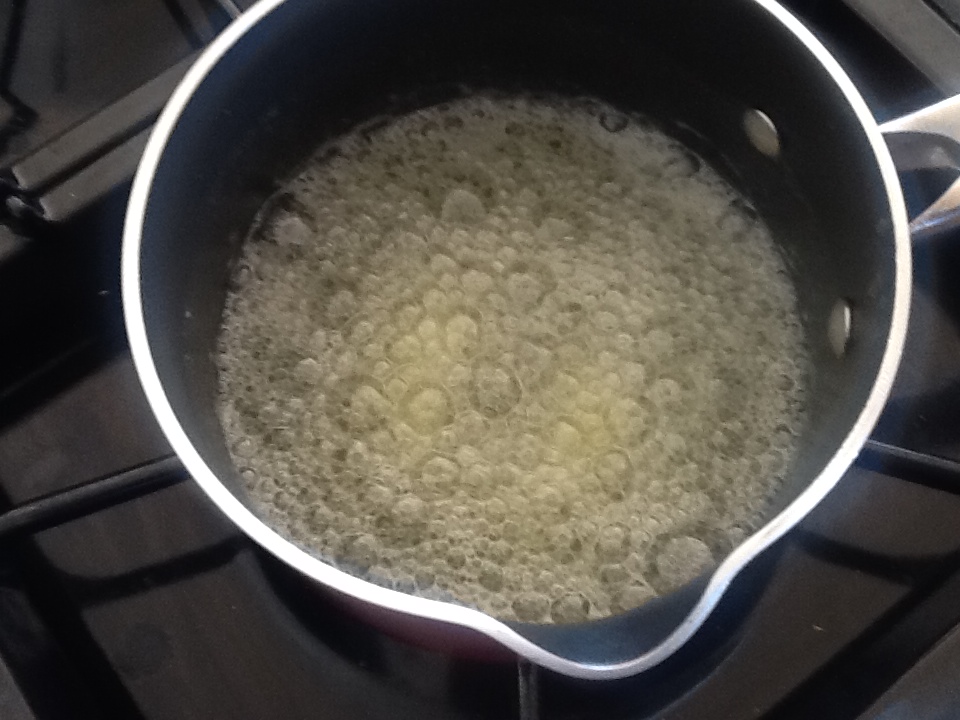
For the cherry glaze, I simmered cherries and a mixture of sugar and water for about 20 minutes.  I strained the mixture, tossed away the cherries and added cherry preserves to the cherry liquid.  I simmered this for a while until it was thick and then dipped the cupcakes in it.

photo 1 (2) photo 3 (2)

Atop the cherry glaze, I piped a pistachio cream cheese frosting.  Very simple, I just added pistachio paste to a regular cream cheese icing.  Finally, I drizzled chocolate ganache on top of the frosting.  Here is the final product.

photo 6

Now, the taste:  Delicious and very different.  Each cupcake had its own personality.  The basic one was moist, very dense (again, much like a muffin), sweet, salty and crunchy.   The spumoni cupcake was also moist and dense, but had an added dimension from the cherry and the chocolate.   They were very different cupcakes, both delectable!

photo 10 photo 3 (3)

If you like sweet and salty, try this!

Next time: Apricot-Glazed Black and White Cheesecakes.

Stay tuned,

Sweet Joan

Winter weather…Summer flavors

photo 4 (3)

Citrus…. it makes me think of summer breezes, barbeques and enjoying fruity and refreshing drinks outside on a warm evening.  But alas, it is still winter here in Colorado and the snow-covered mountains are a daily reminder of that fact.  So, what better way to bring summer flavors to Colorado than by making Triple Citrus Cupcakes.   Also, I was surprised to learn that citrus fruits are in season during the winter months – so this is the perfect time!

photo 1 (4)

Okay, lets see what Martha has in store for us this time…click here for the recipe.

Mise en place

photo 2 (4)

Whisk together the dry ingredients and set aside.  Cream butter (1 pound!) and sugar until pale and fluffy and then add orange, lemon and lime zest.

photo 3 (4)

photo 4 (4)

After adding the vanilla, add the eggs (3 at a time) and mix until fully incorporated.  Finally, add the flour.

photo 5 (4)

photo 1 (2)

photo 4 (2)After baking, this is what they look like.  I was a little bit concerned because of the lack of leavening in the recipe.  But, the cupcakes rose quite nicely and the texture was very dense, almost like pound cake.  My guess is that because of the large number of eggs, this helped to stabilize the batter.

photo 3 (2)

As a final touch, the recipe called for a citrus glaze that the cupcakes would be dipped into.  I did this for one half of the cupcakes, but I used a Lemon Lime Cream Cheese Frosting for the other half.

Here are some pictures of the final product.  I have to say that these cupcakes were very different; they were dense, citrusy and not too sweet.  They reminded me of muffins; not a bad thing!  I think these would be perfect as a breakfast treat – probably glazed, not frosted!

photo 5 (2)

photo 1

photo 5

photo 2If you’re looking for a supersweet and light textured cupcake, this one is not for you.   But, if you enjoy tart citrus flavors, you will love this.  Try it!

Stay tuned,

Sweet Joan

Brown Sugar and Butter? Oh yeah!!

photo 4 (2)

Nothing will get my attention faster than a recipe that features brown sugar and butter…well okay, chocolate usually does that too!  So, when I saw that the next cupcake on my list was Brown Sugar Pound Cakes I knew this would be a winner.   I have always loved pound cake; it’s buttery, dense and oh so delightful.   It pairs well with any type of topping – frosting, fruit, whipped cream, the list is endless.   I was anxious to try this brown sugar twist.

Click here for the recipe.

Lets get started!

Mise en place

photo 1

After whisking together the dry ingredients, cream butter and brown sugar until pale and fluffy.  Next, add the eggs one at a time and mix well.

butter and brown sugaradd eggs

Add dry ingredients alternately with buttermilk and beat until combined.

photo 5photo 4

That’s it!  So easy!

Here are the cupcakes after baking.

out of the oven

When the cupcakes are completely cool, make the Browned Butter icing.  I made this icing once before for the pumpkin cupcakes I served at Thanksgiving.  It is amazing and perfect for these cupcakes.

For the icing: Melt butter in a small saucepan and cook until a nut-brown color is achieved.  Add the browned butter to confectioners sugar, vanilla, and cream.  Stir this mixture until smooth.

photo 1 (3)photo 2 (3)

The recipe instructions say to spoon the icing over the cupcakes…too messy!  I decided to dip the cupcakes in the icing – much better.

photo 3 (3)photo 4 (3)

Final step: Tasting!  What did I think?  One word:

photo (5)

Even though the cupcakes didn’t really taste like pound cake, they were awesome!  Dense, moist and buttery with a hint of caramel or butterscotch.  Oh my..unbelievably good!  I will be making these again!

Here are some pictures:

photo 5 (3)photo 2 (2)

photo 1 (2)

Coming up next: Triple Citrus Cupcakes. Hmm….interesting

Stay tuned,

Sweet Joan

Cherry Cola Cupcakes: With Chocolate, 2 ways

photo 4 (2)

This is a very special post.  I am participating in a Dessert Challenge hosted by Sheryl at Lady Behind the Curtain.  Each month Sheryl comes up with two ingredients and challenges other bloggers to come up with an amazing dessert using these ingredients.  I love a challenge!  Thanks Sheryl, I have had so much fun creating and experimenting.

Lady Behind the Curtain Dessert Challenge

The two ingredients for this month are Coca Cola and cherry; a classic combo.  My first thoughts were to create a cupcake using my mother’s Coca Cola cake recipe and combining this with cherries somehow.   Simple, right?  Oh, no – not simple at all.  The cupcakes were dry and flavorless – sorry, mom – and were completely overpowered by the cherry filling.  I needed to rethink this.  I started thinking about the flavors in coca cola: citrus, hints of vanilla and some spicy notes.  Then, I thought about cherry cola.  Yes!!!  Here are some flavors I can work with!  Instead of a chocolate cake, I tried a vanilla cake with cherry cola for the liquid.  Not memorable; the cherry cola flavor was not evident at all.   Then I remembered coca cola syrup, concentrated cola flavor!  So, how about cherry cola syrup – is there such a thing?  After doing some research on the internet, I found a recipe for this wonderful ingredient at a website called DIY Cocktails by Marcia Simmons.  I made the syrup and WOW, what flavor!   I can honestly say that these cupcakes really taste like cherry coca cola.   Couple this with hints of chocolate, black cherry filling and cherry cola cream cheese frosting and this one is a winner.   Try it, you won’t be sorry.   Oh, the two ways?  Read on….

Mise en place

photo 1 (2)

First, beat butter until creamy and add sugar, vanilla bean paste and almond extract.  Add egg whites and beat well.  Finally add dry ingredients alternately with buttermilk and cherry cola syrup.  Easy peasy.

photo 2 (2)

photo 3 (2)

photo 1 (4)photo 2 (4)

When they are finished baking and cooling, fill with black cherry preserves.

photo 4 (3)photo 5 (3)

Next, prepare the chocolate ganache and dip one half of the cupcakes in the ganache.  Let the chocolate set for a few minutes.  (This is the 1st way)

photo 1 (3)

Prepare the frosting and frost all of the cupcakes.

(2nd way) Place the cupcakes without the chocolate ganache in the freezer for about 15 minutes.   After 15 minutes, dip each of the cold cupcakes in the remaining chocolate ganache.

This is how they came out:

photo 5 (2)photo 1

photo 5

Cherry Cola Cupcakes with chocolate (2 ways)

(Adapted from Better Homes and Gardens)

Cupcakes

1/2 cup butter
4 egg whites
2 cups all-purpose flour
1 teaspoon baking powder
1/2 teaspoon salt
1/4 teaspoon baking soda
3/4 cup buttermilk
1/3 cup cherry cola syrup
1 1/2 cups sugar
1 teaspoon vanilla bean paste
1/2 teaspoon almond extract

Cherry Cola Syrup: Get the recipe here (Published with permission from Marcia Simmons, DIY Cocktails)

Filling 1 cup Black cherry preserves

Chocolate Ganache (Adapted from Martha Stewart)
8 oz. bittersweet or semisweet chocolate
1 cup heavy cream
2 Tbsp white corn syrup

Cherry Cola Cream Cheese Frosting
1-1/2 cups butter, softened
16 oz. cream cheese – COLD
1 lb. confectioners sugar
1/2 cup cherry cola syrup
1/2 cup black cherry preserves
1 Tbsp vanilla bean paste
1 tsp almond extract

Directions

Cupcakes:
1. In a medium bowl stir together flour, baking powder, salt, and baking soda.  Combine buttermilk and cherry cola syrup; set aside.
2. Preheat oven to 350 degrees F. In a large mixing bowl beat butter with an electric mixer on medium to high speed for 30 seconds. Add sugar, vanilla, and almond extract; beat until combined. Add egg whites, one at a time, beating well after each addition. Alternately add flour mixture and buttermilk mixture to beaten mixture, beating on low speed after each addition just until combined.
3. Spoon batter into prepared muffin cups, filling each about two-thirds full.
4. Bake for 15 to 18 minutes or until tops spring back when lightly touched. Cool cupcakes in muffin cups on wire racks for 5 minutes. Remove cupcakes from muffin cups. Cool completely on wire racks.
5.  When completely cool, fill cupcakes with black cherry preserves.
6.  Dip tops of one half of the cupcakes in chocolate ganache.
7.  Frost all of the cupcakes with Cherry Cola Cream Cheese Frosting.  Place the cupcakes that were NOT dipped in ganache in the freezer for 15 minutes.
8.  After 15 minutes, dip the cupcakes that were in the freezer in the chocolate ganache (the cream cheese frosting will be covered with ganache).

Chocolate Ganache:
1. Coarsely chop chocolate.
2. Bring cream just to a boil over medium-high heat. Pour over chocolate, and add corn syrup. Let stand for 10 minutes.
3. Stir with a whisk until smooth and shiny to break up any pieces and emulsify cream and chocolate.

Cherry Cola Cream Cheese Frosting
1.  Beat together butter, confectioners sugar, syrup, preserves, vanilla and almond extract until creamy.
2.  Add COLD cream cheese a few tablespoons at a time until completely mixed together.   Do not overbeat!

Yield: 18 cupcakes

Next time, back to Martha!

Stay tuned,

Sweet Joan

Powered by Linky Tools

Click here to enter your link and view this Linky Tools list…

You had me at peanut butter…

peanutbutterday12[1]

“Peanut butter [is] the pâté of childhood.” – Florence Fabricant

I’m not sure when my love affair with peanut butter began; I cannot remember a time when I didn’t love it!  Peanut butter cookies, peanut butter and jelly sandwiches, peanut butter on buttered toast, Reese’s peanut butter cups – the list is endless.  Now on this special day, National peanut butter day (yes it’s real, I looked it up), what better treat than Peanut Butter and Jelly Cupcakes!  Oh, and today is also my birthday – coincidence? I think not!  These cupcakes were pure comfort food; the texture and taste reminded me of a peanut butter cookie.  The intense peanut butter batter was filled with chunks of peanuts along with a rich peanut butter frosting and an embellishment of strawberry jam on top.  Pure whimsy.

This is how I made them:

Mise En Place

photo 5 (2)

First I whisked together the dry ingredients and then creamed the butter and sugar until it was pale and fluffy.  When this was done,  I added the peanut butter, eggs and vanilla.

photo 1 (2)photo 2 (2)

photo 4 (2)

I gradually added the dry ingredients and when this was combined thoroughly,  I mixed in the sour cream and chopped peanuts.

photo 5 (3)

As you can imagine, the aroma from my oven was heavenly!  When they came out of the oven, I was tempted to try one immediately but I resisted and let them cool.

photo 1photo 2 (3)

The frosting I made was Peanut butter cream cheese.  The frosting? It was to die for. It was like eating peanut butter right out of the jar. But peanut butter that was so much richer and full-flavored than anything you’ve ever had before. I mean, peanut butter with cream cheese and whipped cream mixed in?  Can you imagine anything so good?  No, I can’t either.

photo 3After I frosted the cupcakes, I added a dollop of strawberry jam on top.  Gilding the lily, yes.  But, oh so worth it.

There you have it…it’s a classic combination –  Peanut Butter and Jelly.  It’s sweet and salty, nutty and fruity.  I feel like a kid again!

photo 5

photo 4


Next time: Brown sugar pound cakes.

Stay tuned,

Sweet Joan

Old Fashioned Comfort

thJACLYJ3E

“Good, old-fashioned ways keep hearts sweet, heads sane, hands busy.”  ~ Louisa May Alcott

I adore old fashioned desserts; pineapple upside down cake, apple crisp, peach cobbler, chocolate cake and the like.  Just thinking about these goodies makes me smile.  thIKHV9FQ3


thIU3WC3UW


It reminds me of the days during my childhood when tables of these yummy desserts would be present at every family gathering.  Applesauce cake is one of those old fashioned kind of desserts; sweet, spicy and very moist.  Sometimes it had frosting, sometimes just powdered sugar; but always delicious.   Old fashioned desserts evoke a time, a feeling; the kind of comfort that can only be found in the kitchen.

thSZJ1P75M

This cupcake, Applesauce Spice, is a delightful old fashioned treat; just the aroma will send you to a wonderfully warm and cozy place.  Pour a big glass of milk or a cup of coffee and settle in for a delicious repast.

This recipe goes together very quickly and easily.  First….

Mise En Place

photo 1

(Mise En Place is a French term that literally translates to “set in place”.  In the culinary world it means you have everything ready to cook and in its place…sorry, sometimes I just like to show off. )

First of all, I whisked together the dry ingredients along with cinnamon, nutmeg and cloves.   Next, I creamed together butter, granulated sugar and brown sugar.

photo 2

photo 4

After that, I added the eggs, applesauce and the dry ingredients.  When this was well mixed,  I stirred in chopped pecans.

photo 5photo 1 (2)

photo 2 (2)photo 3 (2)

Here they are, out of the oven.  Yum.

photo 4 (2)

The frosting that was recommended was a Brown Sugar Cream Cheese frosting.  I thought I had tasted almost every kind of cream cheese frosting, but this one was new to me.

First I creamed the butter and brown sugar.  Next, I added confectioners sugar and beat this until smooth.  Finally, I added the cream cheese and beat everything together.

photo 3 (3)

photo 2 (3)

Here they are after adding the frosting.  Cute, huh?

photo 5 (3)

photo 3 (4)

I used an “old fashioned” plate to display these, it actually belonged to my late mother-in-law.  The candle sticks are very old and belonged to my husband’s grandmother.   Seemed appropriate for these cupcakes.

I loved these; they were deliciously moist and perfectly flavored.   They were not overly sweet which complemented the frosting very nicely.   And speaking of frosting – it was divine; not too sweet and more flavor depth than an ordinary cream cheese frosting.

photo 4 (4)

Do yourself a favor and make a good old fashioned dessert soon.  You never know what memories and good times it will bring back.

Next up: Peanut butter and jelly cupcakes.

Stay tuned,

Sweet Joan

To Joe…till we meet again

photo 5 (4)

The man in the picture at the top of this post is my dear Uncle Joe who passed away just before Christmas.  He was a wonderful and kind man who we loved dearly.  Family was everything to Joe, he was someone all of us could count on for anything.  He was truly a treasure and we miss him very much.

Joe was a very successful and gifted baker and his Italian heritage led to many delicious pastries and desserts that his family enjoyed, especially around the holidays.  Because of his love for baking and everything Italian, I decided to honor Joe by dedicating this post to him and by baking an Italian treat.

I am making Piccoli Torta al Caffe con Copertura alla Mousse al Cioccolato which is Mocha Cupcakes with Chocolate Mousse Frosting.  I adapted this recipe from one I found at a wonderful blog called Grace’s Sweet Life.

Okay Joe, this one’s for you:

First, as usual, I gathered my ingredients.  Since this recipe called for cake flour, I sifted it along with the other dry ingredients.

photo 1 (6)

photo 4 (6)

Next, I dissolved espresso powder into freshly brewed espresso and melted the bittersweet chocolate (actually, I used semisweet this time – just because).   I creamed butter and added granulated and brown sugar.  When this was mixed, I added the eggs.

photo 5 (6)photo 5 (2)

photo 2 (6)

Finally, I added in the dry ingredients alternately with buttermilk and then the espresso, chocolate and vanilla paste.

photo 5 (5)photo 4 (5)

photo 1 (5)

The batter was luxurious..these had to be good!  I hoped they would turn out better than the last mocha cupcakes I made.

photo 2 (5)

Here they are out of the oven.  They looked and smelled amazing!

photo 3 (5)

The frosting for these cupcakes is an Italian mousse frosting.  Not for the faint of heart….the eating or the preparing!

For the frosting, I started by melting semisweet chocolate.  Next, I combined water and granulated sugar and boiled this mixture until it reached 243 degrees.

photo 1 (4)photo 2 (4)

Meanwhile, I beat 4 egg yolks in a mixer until they were pale, thick and creamy and then slowly poured the boiled sugar syrup into the yolks and beat this mixture at high speed until it was thick and cooled.  At this point, I stirred in the melted and cooled chocolate.

photo 3 (6)photo 4 (3)

Next, I beat heavy whipping cream to medium peaks and then added this to the chocolate/yolk mixture – first whisking in 1/3 of the mixture and then gently folding in the remaining cream.

photo 3 (3)photo 5 (3)

Not done yet!  Next, I passed this mousse mixture through a fine mesh sieve into another bowl…yeah, it was a real pain- but necessary to get this frosting really, really smooth.  It was worth it, believe me!

photo 2 (8)

Here is the final product.  They were scrumptious, much better than the mocha cupcakes I made last time.  The chocolate flavor was dark and intense with just a hint of coffee at the very end.  But, that hint made the chocolate flavor even better.  And the frosting…omg!! Forget about it, astonishingly good!

photo 4 (7)photo 3 (2)

All in all, a success.  Just as it should be for our Joe.  photo 2 (3)

Until we meet again Joe, may God hold you in the palm of his hand.

Stay tuned,

Sweet Joan

Gingerbread with an Attitude!

photo (65)

I have a long history with ginger; it runs the gamut from using ginger in stir fry recipes and gingerbread cookies to designing and creating gingerbread houses.  The sweet and spicy fragrance of ginger is unmistakable and intoxicating.  The picture at the top of this post is a gingerbread house I made for Good Housekeeping magazine many years ago.  It was a huge project and took many weeks to complete, but the magazine liked it so much that it was displayed at Radio City Musical Hall during the Christmas season in 2001.  So yeah, ginger and I go way back!

The next cupcake in my journey through Martha Stewart’s cupcake book is Ginger and Molasses cupcakes. Yes! Perfect! Right up my alley! I love all things gingerbread and, next to chocolate, it’s probably one of my favorite things.

Let’s get started:  The most daunting part of this recipe is preparing the fresh ginger.  Here it is, ginger root.  Pretty homely, but oh so delicious.  The easiest way to peel ginger is with a teaspoon.  Sounds strange, but it really works.

photo 4

Next, mince the ginger.  I used a mini food processor because the recipe called for 1 cup.  That’s a lot of ginger!  After this it’s pretty easy.  Whisk together the dry ingredients and add these to a bowl containing sugar, molasses, eggs, and melted butter.  After these ingredients are thoroughly mixed, stir in the ginger.

photo 5  photo 1 (2)

When the cupcakes were done, I was a little perplexed.  They sunk!  But, then I read the recipe again and found out that sinking is what these cupcakes will do.  Whew!!

photo 2 (2)

After cooling, I topped the cupcakes with slightly sweetened whipped cream.  When I tasted them, I was not disappointed.  They were sweet and spicy…much spicier than regular gingerbread.  The texture was amazing, dense and moist with a crunchy top that was irresistible!  Success!  This is gingerbread taken to a whole new level…or, gingerbread with an attitude.photo 4 (2)

photo 3 (2)


In my next post, I plan to make a slight detour and pay homage to a dear uncle of mine who passed away recently.  He was a wonderful person and a fabulous baker.   I will be baking something in his honor that I think he would have loved.

Stay tuned,

Sweet Joan

Ode to a Date…nostalgic, but not dessert

photo 5

Dates….not a huge fan.  In fact, in my opinion, dried fruit is not dessert.  If I am going to have something sweet, it will usually be in the cake family.  And chocolate.  And gooey.  That being said, there are a few things about dates that I think of with fondness.

Date and walnut bread_4I have a memory of delicious date nut bread that was made by Van de Kamp bakery when I was young.  My mom introduced me to this treat, warm and slathered with cream cheese.  Oh my, it was yummy…but not dessert.

ps angels

And, how could I forget Date Shakes from Hadleys near Palm Springs, California.  My dad was a huge California Angels fan and when I was young, we spent many weekends driving out to watch the Angel’s spring training games.  Date shakes were part of the experience…but not dessert.

So, I guess dates hold a certain nostalgia for me, but again…they are not dessert.

By now all of you date lovers out there are probably getting pretty annoyed at me for maligning your precious dates.  I promise I will keep an open mind as I attempt to recreate some of those date memories from my childhood with the next cupcake in my quest…Date nut cupcakes.

After lining the muffin pans, I whisked together the dry ingredients.  This recipe includes one of my favorite spices, cardamom.   Then I chopped dates. And chopped. And chopped.  And chopped.  Did I mention that there were lots of dates?   I added  boiling water to the dates and butter.  After stirring for a few minutes, I added brown sugar, a beaten egg and vanilla paste.  Finally, I stirred in the dry ingredients and walnuts.  Easy peasy.

photo 3 (2)photo 1 (2)

photo 4 (2)photo 1

The batter reminded me of a muffin batter, maybe because of all the dates and nuts.

photo 3 I have to admit, the aroma was fantastic.  After they were cool, I frosted them.  Again, very easy.  The suggested topping was crème fraiche.  OMG…now, we’re talking!  I almost decided to deviate from the original recipe and frost these with cream cheese frosting, but am I glad I didn’t.  I hope that all of you have had a chance to try this amazing ingredient.  It is very hard to describe; not sour cream, not butter, not whipped cream or cream cheese – just imagine taking the best of all of these ingredients and you have crème fraiche.  Add to this no prep, and what you have is a perfect topping!

photo 4

Now, tasting!  My husband loved these.  I knew he would because his taste in desserts is just about the polar opposite of mine.  And he loves any kind of dried fruit.   I tasted them and…..they were good! I loved the sweetness and the crunchiness from the nuts.  Plus they were topped with crème fraiche.  Yum.


photo 2 (3)


I cannot lie, these were good but certainly not my favorites.  A few others who tasted these also liked them very much.  They mentioned sweetness and moistness and called them muffin-like.  I can’t say that I have completely changed my mind about dates, but it was nice remembering date nut bread and date shakes.  Good times.


Stay tuned,

Sweet Joan

Got Leche?

photo 3

I am so happy to be back to a regular baking and blog schedule..or at least I hope so!   It’s amazing how busy you become when you are retired, but usually the time is filled with tasks that are enjoyable. Usually.  The real world rears its ugly head from time to time, but I try to take it in stride.  I hope to be able to do a lot more baking and blogging in the near future!

This time the cupcake is Tres Leches.  Tres Leches literally means three milks.  This cupcake is a takeoff on the more traditional Tres Leches cake – an amazing gooey buttery sponge cake that is soaked in a mixture of heavy cream, evaporated milk and sweetened condensed milk.  The result is a heavenly moist cake that is almost pudding-like.  The history of Tres Leches is ambiguous: some place its origins in Nicaragua, while others claim it comes from Mexico or Guatemala.

So…here we go.  First it is important to prepare the cupcake pans correctly.  Because the cupcakes are soaked with the milk mixture, it is necessary to line the muffin tins with a paper liner inside of a foil liner.  Paper liners by themselves just will not hold up to all of the liquid.

photo 3 (3)

Gather the ingredients.  There are surprisingly few!photo 1 (4)

The cake itself is quite simple.  Egg whites are whisked together with baking soda and salt to form soft peaks.  Then, egg yolks are added along with sugar.

photo 4 (3)

Butter is folded in and then flour is added in four batches, gently folding until just combined.  It’s important to handle this batter carefully; most of the volume comes from the whipped egg whites.  After baking, use a toothpick to poke holes in the tops of the cupcakes.


photo 5 (2)

photo 2 (3)


Now, the fun part – soaking the cupcakes in the milk mixture.  Evaporated milk, sweetened condensed milk and heavy cream are whisked together.  This mixture is brushed over the cupcakes, repeating until all the liquid has been used.

photo 4 (2)


At this point, the recipe suggests refrigerating the cupcakes and letting the liquid absorb for at least 30 minutes and up to 1 day.  I wanted to give the cupcakes lots of time to absorb all of the liquid, so I refrigerated them until the next day.

The next day I topped the cupcakes with sweetened whipped cream and here is the result (I sprinkled cinnamon on a few of the cupcakes):

photo 5


photo 2


How did they taste?  They were scrumptious, fabulous, finger-licking!  The flavor is hard to describe; not a traditional cupcake, it is close to a bread pudding but more moist.  It is truly a slice of heaven that tastes even better the second day.

Another triumph Martha!  Try this one – it’s easy as uno, dos, tres!

Stay tuned,

Sweet Joan